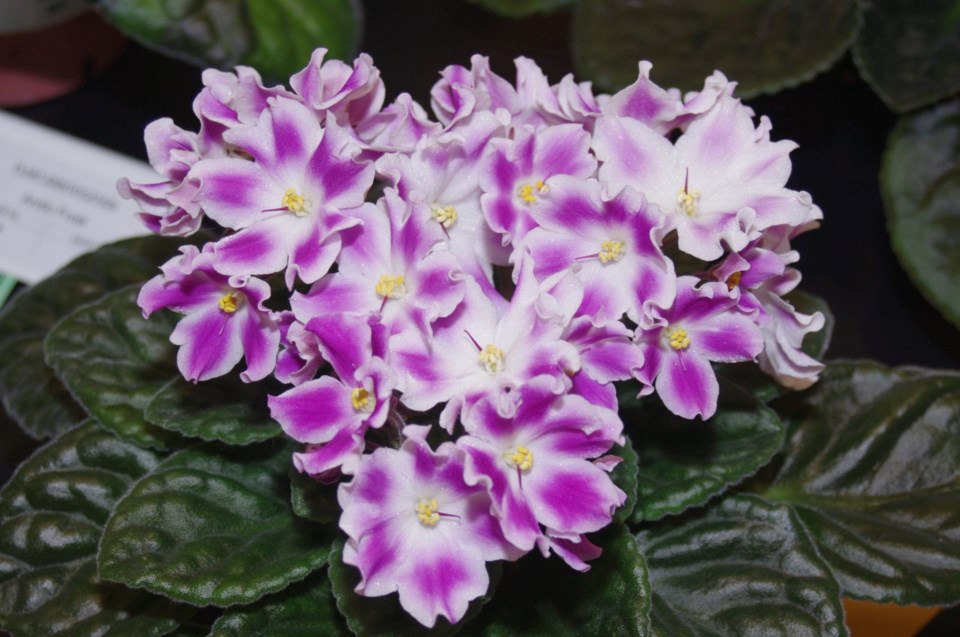
With African violets (Saintpaulia ionontha), the first thing that catches your eye is their cluster of brightly coloured, slightly iridescent blooms that sit atop a tidy interwoven rosette of velvety green leaves. They are also one of the easiest houseplants to grow and to keep flowering, giving you years of beauty. No wonder they have been popular for over 100 years.
African violet seeds were first collected in 1892 by Baron Walter von Saint Paul-Illaire, in what was then German East Africa and today is Tanzania. Named Saintpaulia in his honor, almost all our modern hybrids are derived from these seeds, representing only two species, Saintpaulia ionontha and S. confusa. My friend, Sara Williams, saw the wild species in their native habitat while visiting the Amani Nature Reserve in the East Usambara Mountains of Tanzania. They were growing on a vertical granite wall with water dripping down it, in a habitat so dark it required a flash to photograph them. In their native habitat they require constant shade and humidity and are dependent on surface rather than soil moisture.
Today’s domestic varieties are much different than their wild ancestors. The fleshy, fuzzy leaves are round to slightly pointed; usually light to dark green but can be variegated white and green, sometimes with faint pink tones; and margins can be smooth or wavy. The leaves form on a short stem in a circular, overlapping pattern to form a low rosette. Single, semi-double or fully double slightly iridescent flowers emerge from the leaf axils of recent growth and can be white, pink, red, pale blue, deep purple, striped, multi-hued or even spotted – the latest colour break-through is yellow. African violets range in size from miniatures of less than three inches (1.5 cm) in diameter to giants of 16 inches (40 cm) wide.
When taking care of them, consider their natural habitat in Tanzania – moist and shaded in a semi-tropical mountain environment. Bright, indirect light is best (north- or east-facing window) and avoid direct sun as this may lead to scorched leaves. They will also grow quite well under fluorescent lights with 12-hour days. They prefer average room temperature with high humidity (the latter a challenge in winter). Fertilize with a weak soluble fertilizer solution once a month or use slow-release fertilizer.
African violets do not mind being slightly root bound and rarely require repotting (choose instead to start new plants, see below). Miniatures will be fine in very small pots (1.5- to 2.0-inch / 3- to 5-cm pots), while standard plants grow well in four-inch (10-cm) pots. The potting mixture should be light textured (to avoid water logging) and contain organic matter. Specialized African violet potting mix is available. The root zone should be kept evenly moist but not overly wet to avoid root rot. Water with room temperature water and avoid wetting the foliage as this may cause spotting. Snap spent flowers and older leaves close to the stem.
African violets are easily propagated from leaf cuttings. Choose leaves from the middle of the rosette – avoid older (outside) or very young (centre) leaves. Use a sharp knife to cut the petiole (leaf stem) close to the stem. If the petiole is overly long, you can shorten it to 1.5 to two inches (3-5 cm). Insert the petiole at a slight angle about 0.5 inches (1 cm) deep into moist potting mix. You can have up to four cuttings in a four-inch (10-cm) pot. Cover the container with a clear plastic bag to maintain humidity; place in indirect light. Open the bag occasionally to let out excess humidity. Rooting should occur in three to weeks (you can check with a slight tug), and after about eight weeks, small plantlets should emerge from the soil from the base of the cutting. Once the little plantlets have three to five leaves, carefully uproot the whole cutting, separate the plantlets from their ‘mother’ and plant in their own pots.
Erl gardens in Saskatoon and nurtures a few houseplants to keep his inside landscape looking green.
This column is provided courtesy of the Saskatchewan Perennial Society (SPS; [email protected] ). Check our website (www.saskperennial.ca) or Facebook page (www.facebook.com/saskperennial) for a list of upcoming gardening events)


